Today I’ll show you how to setup Google Analytics step-by-step.
Whether you just started a blog or you’ve created content for quite some time, and you want to gain more insight into the performance of the site, you will need this tool.
Although there are other third party software tools that you use to monitor your blog’s traffic, Google Analytics tends to be a more comprehensive solution on the table.
And the best part is?
It’s easy to setup and free to use, except in the instance where you want to run a paid Ads campaign.
In this guide, I’ll walk you through how to set up Google Analytics and even show you how to connect it to your WordPress as well as custom coded blog.
What is Google Analytics?
Before I show you how to set up Google Analytics, let’s first make sure you understand what the tool is and what it does.
Google Analytics is a powerful tool built by to help you track your site’s performance in terms of traffic. Currently, about 56% of websites use Analytics, making it one of the most popular third-party tool on the web right now.
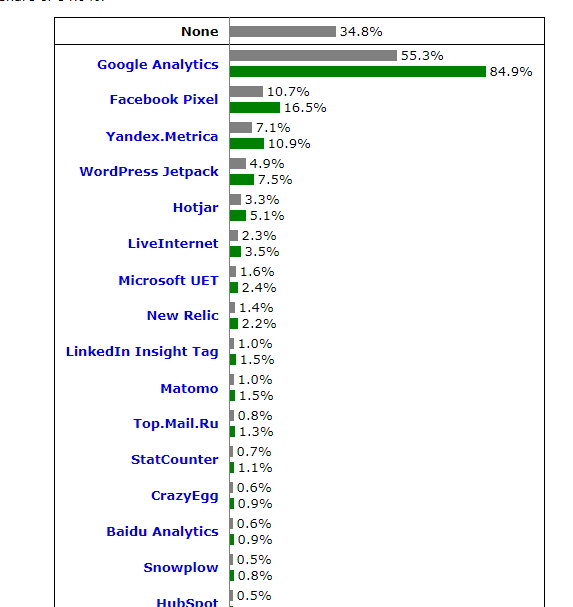
To be clear, I don’t think that Google Analytics is popular simply because it’s free. It’s a product in the limelight because it has tons of useful traffic monitoring and analysis features than any other similar tool on the web.
With analytics, you can:
- How much traffic your site gets within a given period
- Compare traffic between date ranges
- See your traffic sources
- See which keywords get searched the most
- See the pages that generate the most traffic to your site
- And so much more
Given its vastness, I don’t think there’s yet a tool on the web that comes close to what Google Analytics can offer to webmasters and bloggers.
How to Setup Google Analytics
From my experience, setting up a Google Analytics account is one of the easiest things to do in blogging. Follow the steps below to complete your setup in under 20 minutes.
Step 1: Create a Google Account
You will need a Google account to use the Analytics tool.
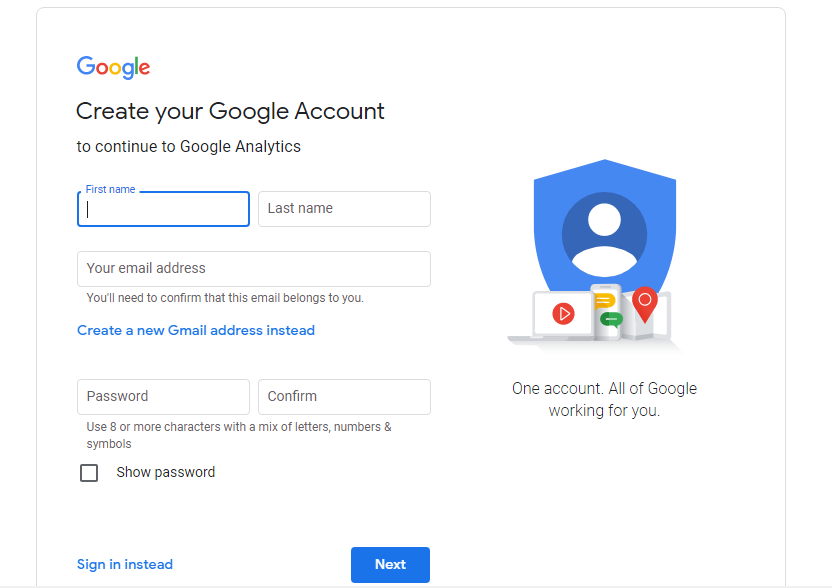
The registration process is quite straightforward and should therefore take about 4 to minutes of your time. You simply have to:
- Sign up here if you don’t have an account yet.
- Follow the instructions provided on every screen until you have an account ready
- Google may ask you to add your phone number for verification, so make sure to provide the details
Step 2: Use Your Google Account to Setup Analytics
Now that you have a Google account, it’s time to set up Google Analytics and get a tracking code to add to your blog.

- Go to this page and click the “Start measuring” button
- Add a new account, leave the data sharing options ticked, and click the “Next” button
- Give your Property Setup a name and click next
- Tell Google Analytics more about your business on the next screen. That includes the category of your site, number of employees, and the way you intend to use Google Analytics.
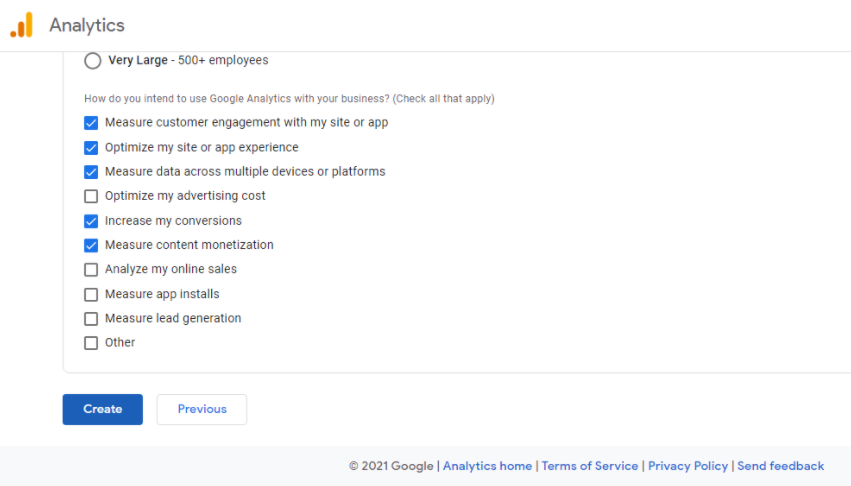
Now click the “Create” button to set up a data stream to collect the data you’d like to track.
While Analytics even allows you to collect Android and iOS app data, you’ll mostly use it to track visitor information about your blog.
In this case, click on the “Web” as your platform.
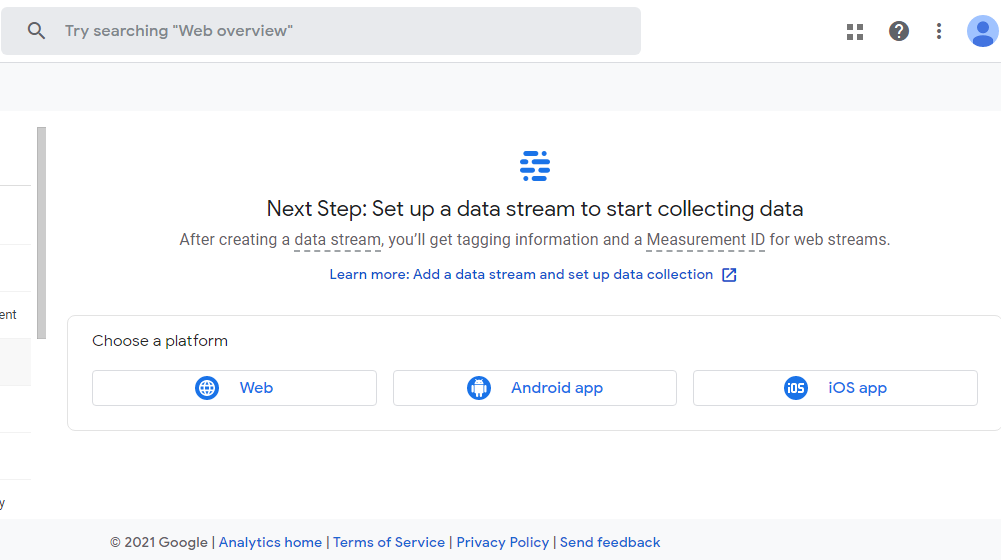
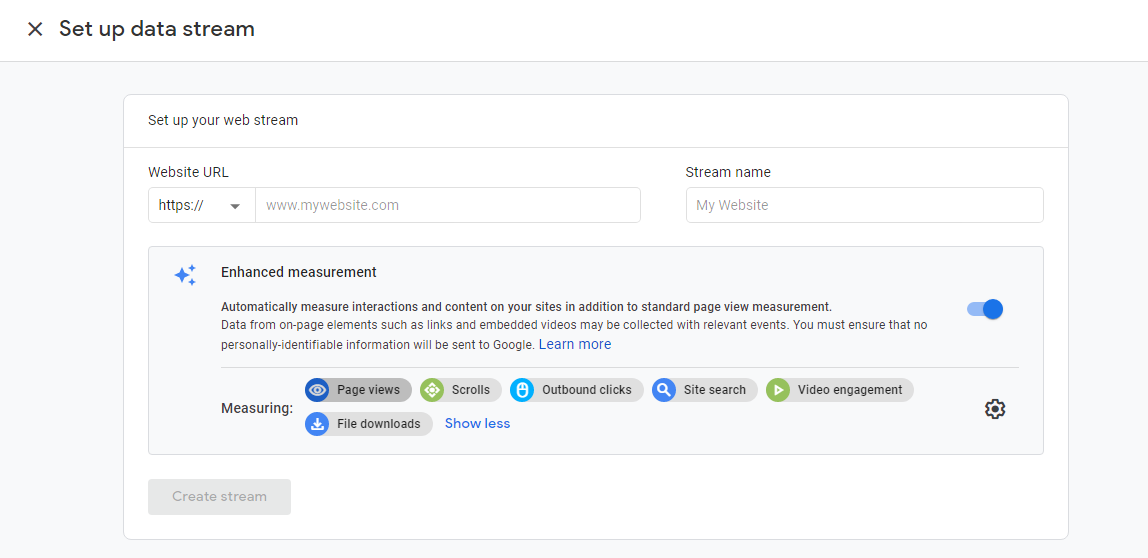
A pop up screen will appear where you add the information about your website so that you can create a stream for it.
You can even see what you’ll be measuring even before you create a stream.
Look at the screenshot below.
Now:
- Enter your Website URL and Stream name. Note that the Stream name can be anything, but the URL should be the root domain of your site
- Click Create stream to generate a tracking code that you can add to your blog
Step 3: Connecting Your Blog to Google Analytics
You’ve already set up a Google Analytics account and it’s now ready to use. All you have to do now it so to add the tracking code to your website.
How to Connect Google Analytics to Your Blog
Up until now, you’ve successfully set up a Google Analytics account and have a tracking code that you can use to measure the performance.
The code will allow you to get useful metrics like:
- The number of visitors to your site on a daily, weekly, monthly, and yearly basis
- Traffic sources
- Amount of time spent on page on your website
- The bounce rate and
- The best performing search terms and pages
But before you see this data, you’ll need to add the tracking code to your blog and wait a few days for Google to collect that information.
So in the rest of this guide, I’ll show you a number of ways to connect Google Analytics to your blog so that you can start tracking its performance right away.
It doesn’t matter if you’ve built your blog on WordPress CMS or custom coded the entire system. There’s just the right method to connect GA to the platform and enjoy the benefits that comes along with the tool.
1. Use the Google Analytics Plugin by MonsterInsights
Companies like PlayStation, Zillow, and Bloomberg use the Google Analytics plugin by MonsterInsights for a reader. It’s an extension that delivers what it claims, and it has stayed true to that promise from the very beginning.
I use this plugin to monitor the performance of my website. And if I’m being honest, it’s by far the best WordPress analytics plugin out there.
With over 3 million installs and hands on 1,000+ five star reviews, the MonsterInsights is no doubt a great tool you can start using right now.
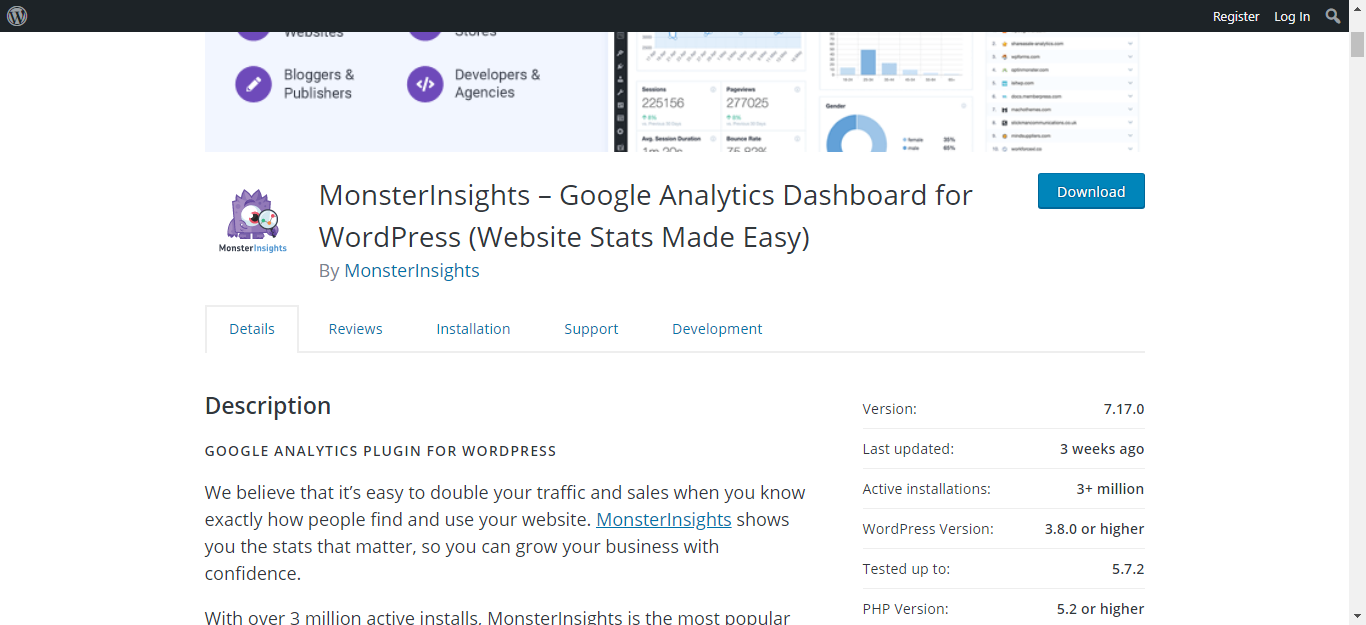
MonsterInsights is available for free installation, and there’s a premium version for bloggers who’d like to take advantage of advanced features such as ads and e-commerce tracking.
Since you’re just getting started with blogging, the free installation for WordPress should be good enough for you.

The free version allows you to:
- Check your sessions and page view reports
- Determine your average session duration
- Know the visitor’s bounce rate
- Check where your traffic is coming from and from which device
- See which pages are getting the most traffic from different traffic sources
For a newbie blogger or someone who just wants to get the most out of the free plugin, this information should be sufficient.
To get started with MonsterInsights:
- Go to WordPress plugins repository from your WordPress admin area and search for MonsterInsights
- Install and activate the plugin
The plugin will create an “Insights” link to your WordPress navigation. Clicking that link should bring you to a set up page, which looks like this.
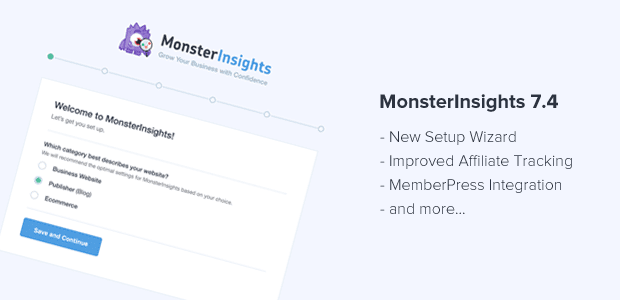
- Choose a category that best describes your website.
- Click the “Save and Continue” button
On the next screen, click “Connect MonsterInsights” button to connect Google Analytics with WordPress.
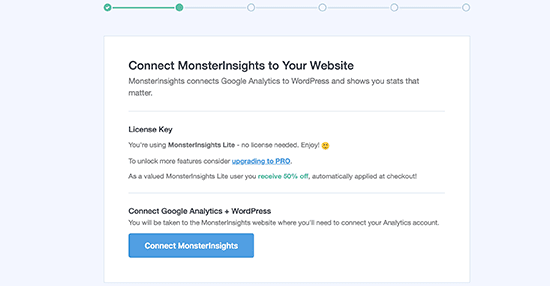
This will take you to a screen where you’ll login to your Google Analytics using the email and password you used to set up the GA account.
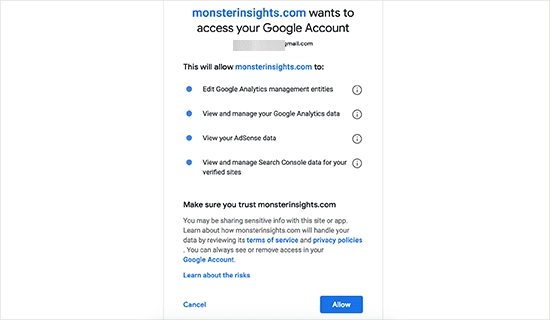
- Click “Allow” to grant MonsterInsights the permission to access your Google account
- Now select the web property that you would like to track from the next screen.
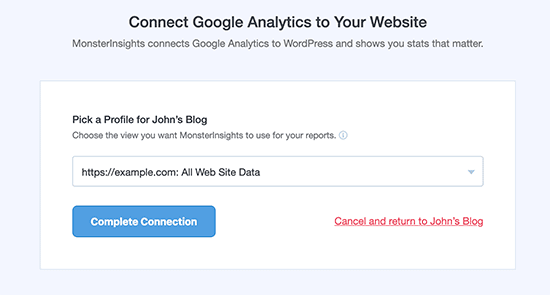
- Click Complete Connection to allow MonsterInsights to connect your Google Analytics to WordPress
- On the next screen, choose the recommended settings for your blog and save changes
- Skip the paid add-ons and the forms plugin (unless you need them)
Now click the “Finish Setup & Exit Wizard” to complete the connection.
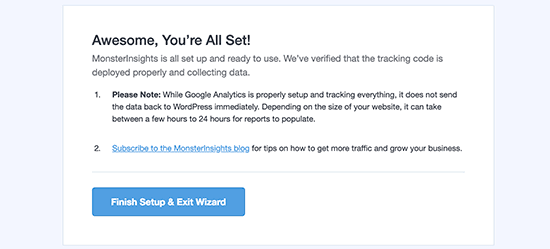
You have now successfully added Google Analytics to your WordPress blog with the MonsterInsights plugin.
2. Use a Header and Footer Plugin
This is a simple option to add Google Analytics to your WordPress blog. But you won’t see the analytics data in your WordPress dashboard.
But that isn’t a bad thing because all you’ll have to do is to login to your Google Analytics account to access your data.
The most important thing here is to ensure you connect your site to Google Analytics.
For this method:
- Install and activate insert headers and footers plugin
- Go to settings and click “insert headers and footers”
Login to your Google Analytics accounts and copy your tracking code.
Add this code in the script in header in the Insert Headers and Footers plugin you installed earlier.
3. Manually Add the Tracking Code to Your Theme
This option is for you if you are familiar with coding, or if your site isn’t built on WordPress.
- If you’ve built the blog on WordPress, go to theme editor, click the header.php file, paste your tracking code in the file, and save changes
- If you’ve custom coded your blog, you probably have primary header or footer for your blog. Copy and paste the code and save changes
While this method works well, it isn’t the most reliable option. Your settings will disappear if you change your theme.
Conclusion
That’s all there is to setting up a Google Analytics account and connecting it to your WordPress blog or custom coded site.
Depending on how you’ve built your site, pick an option that would best work for you and create a connection.
The whole set up should take you about 60 minutes to complete.

